At this stop, the focus is on setting up and using your planning framework.
Leverage proven best practice planning methods to create your information product without overwhelm.
Utilising a best practice planning framework and methods helps online entrepreneurs create digital products efficiently and effectively for maximum profit.
Reduce Product Creation Overwhelm by Effective Planning
Have you ever felt:
The goal of setting up the planning framework is to significantly reduce product creation overwhelm.
We aim to reduce those moments of panic when you wake up in the middle of the night, worried that you forgot an important step or forgot a vital piece of your product. Don't let poor planning, or worst of all, lack of planning stand in the way of a restful night's sleep.
Setting up your planning framework is essential to establishing a solid foundation upon which you will build your information product offering, now and in the future. You will reap huge rewards from your investment in planning as you can reuse this framework and the planning components you will create for future information product creation projects.
This stop is about taking a methodical approach to setting up your planning framework, so don't be put off by the terminology used throughout this stage. Because there are so many planning frameworks we felt it was important to give you an overview of the framework we have selected first so that you can put into context the planning terminology that you may already be familiar with.
So let's start planning for success.
Project Planning Methodologies and Frameworks
There are many different planning methodologies and planning frameworks out in the marketplace. In fact, deciding which one to use is enough to give you a headache and make your eyes water!
It would be nice if there was just one project approach that works for all projects. Unfortunately, it's not that simple. Project complexity, project type, experience and the norms within specific industries can influence the choice of project approaches used.
That means we need to make an informed choice of which methodology we use. Believe me, there are a whole truckload of those as well as a whole bunch of variations along with them.
Traditional methods utilise a relatively linear sequential approach. You gather all the requirements, document them, try and not to let any changes happen along the way. Then present the fruits of your labour some months later. Hopefully on time and within budget. Frequent changes in scope and user requirements are viewed as a source of project risk, something to be discouraged.
Value is delivered at the end of the project.
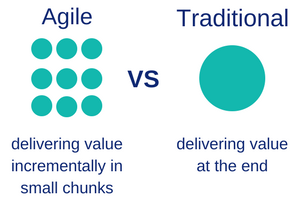

Agile methods utilise an incremental approach. Planning is 'just in time' which allows the flexibility to cater for changes throughout the project. Delivering in smaller increments throughout the project allows changes to be incorporated more easily.
Value is delivered incrementally throughout the period rather than delivering value at the end.
Methodologies and planning frameworks that emphasise close collaboration between teams, frequent delivery of business value. As well as smart ways to craft, confirm, and deliver products have become essential tools for product developers. The ability to cater to changes throughout a project, manage in environments with high levels of uncertainty and deliver benefits in faster more frequent increments has lead to the popularity of Agile methods.
What is Agile?
Agile is a term used to describe approaches to product development emphasising that they are built incrementally and delivered incrementally. It is a philosophy that promotes team collaboration, continual planning, and continual learning. The term “Agile” was coined in 2001 in the Agile Manifesto.
The manifesto set out to establish principles to guide a better approach to software development. One of its main benefits is the ability to adapt and change at any step (depending on feedback, market conditions, business obstacles, etc) and to supply only relevant products to the market. This is why agile principles have been so widely adopted and also well suited to the information product arena. Agile is often referred to as an umbrella for the various methods and frameworks.
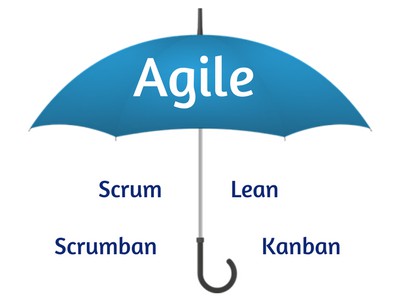

Planning frameworks and methods such as Scrum, Kanban and Scrumban (a blend of Scrum and Kanban), utilise Agile practices and employ 'planning on demand' techniques.
They have been around in various forms since the 80's, so they are not just the 'latest fad'. Today these planning frameworks and methods are used to manage the delivery of a variety of knowledge products in a wide range of industries, not just manufacturing or software development.
While you don't have to worry about all the theory behind the various methods (unless you want to of course). You can have the confidence that the methods that we utilise here are founded on solid, proven, good development practice that delivers value.
Selecting a Planning Methodology For Online Entrepreneurs
While there are other Agile approaches, Scrum, Kanban, and Scrumban are the most commonly used.
What is Scrum, Kanban and Scrumban?
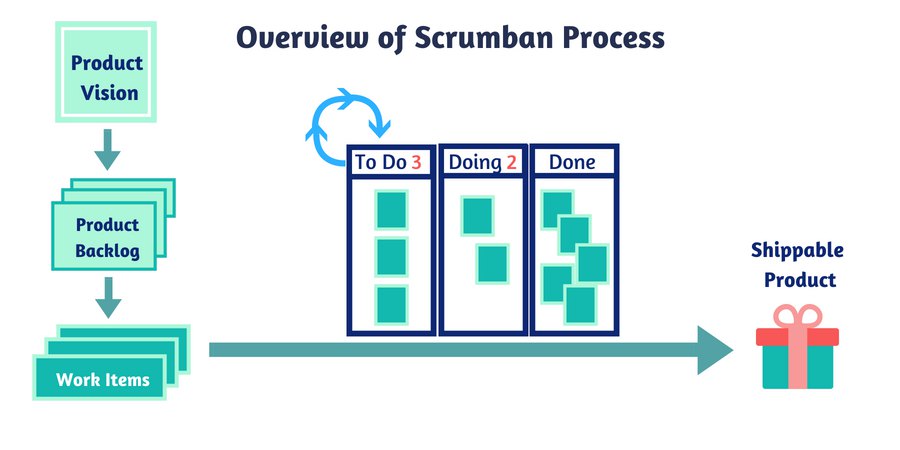
Scrum is an Agile framework for completing complex projects. The team pulls small chunks of work from the top of a wish list (known as a backlog) and works on them in set time period slots known as sprints. At the end of each sprint the work produced is ready to hand to the customer (ie it is shippable).
Kanban is a visual method with an emphasis on just-in-time delivery. The flow of work is managed by limiting work in progress (WIP) to match the team's capacity rather than pre-selecting work to be done within a set period of time. Workflow is visualised and displayed on a Kanban board (aka planning board).
Scrumban is a blend of the best elements of both Scrum and Kanban. Scrumban combines the structure of Scrum with the flexibility, visualisation and flow-based methods of Kanban. This highly versatile approach to workflow management utilises work in progress limits and prioritisation on demand, pulling work items into the system to maintain a continuous workflow. Utilising the Definition of Ready assures that the necessary level of analysis prior to starting development is completed. The planning board (Kanban board) provides high visibility and is key to managing throughput.

Using a Scrumban Hybrid for Information Product Creation
For my business, I utilise a hybrid of the Scrumban method. Depending on the project the team size may change. Whether the standard Scrumban meetings are held or not will depend on the team size at the time. Clearly, you don't need to have meetings with yourself for status updates or weekly prioritisation etc when you are a team of one. Mind you, I have been known to give myself a stern talking to when getting off track or finding myself at the bottom of another rabbit hole, but hey, doesn't everyone.
If you are in the early stages of online business development, odds are that you do as much as you can yourself to keep costs low. As you increase your income the option of outsourcing specific activities or tasks starts to become more viable. At some point, you may consider building a team within your business to share the workload. Leveraging the benefits of team collaboration will then come into play.
No matter what your business size using a framework that can grow with you is important.
The key aspects of the Scrumban methodology I always apply, irrelevant of team size are:
- Visualise the work and workflow using a planning board (aka Kanban board)
- Limit the work in progress (WIP) to reduce the amount of unfinished work in process
- Manage the flow to ensure a smooth flow of work
- Identify opportunities for continuous improvement and leverage 'lessons learnt'
- Utilise the 'Definition of Ready' and 'Definition of Done'
As an online entrepreneur, we often find ourselves wearing many hats. From website designer, marketing manager, product creator to the business manager and a lot more in-between.
Therefore you will also likely be the person who:
- defines the work to be done
- decides what order to do the work
- creates the product
- tests the product
- finalises the product
- manages the overall project
The beauty of the Scrumban method is the ability to 'adopt and adapt' various aspects to suit your own business.
Realisable Benefits
As a business owner who is solely responsible for product creation, service delivery and support it is very easy to fall into the trap of being stressed and overburdened with work. Spinning too many plates at once. The very thing that we often gave up our 'day job' to avoid. You can, however, have confidence that the methods used here are tried and tested over many years and are 'fit for purpose'. At the end of the day which planning framework you choose is up to you. The important thing is that you choose one and apply it consistently.


Benefits of the Scrumban methodology when compared to traditional planning frameworks and methods include:
- inexpensive to set up and maintain
- ability to deliver higher quality work faster and in a healthier and more sustainable way
- helps get value into the hands of the customer quicker
- encourages the abandonment of frantic, chaotic ways of working
- ability to view the work from conception to completion
- helps to reduce the number of unfinished tasks and increase the rate of completion
- easy to use
Key Terms Explained
Work in Progress (WIP) Limit
A limit is placed on the maximum number of work items that are in progress at any time within a specific project stage of the workflow. The aim is to reduce multi-tasking and to finish what you’ve already started before taking up anything new. Different stages of the development process may have a different WIP limit.
Stop Starting. Start Finishing!
The capacity of the team will determine the WIP limit. Generally, the WIP limit will be no more than the total number of team members working on the specific project stage.
You can think of using Work In Progress limits like limiting the number of cars that can enter a motorway. Left unchecked the motorway quickly becomes congested and eventually slows to a halt impacting on the throughput. By limiting the number of cars entering to an optimised amount, the flow becomes constant and throughput is maximised.


Product Backlog
The Product Backlog is an ordered list of everything that is known to be needed in the product. It lists all features, functions, requirements, enhancements, and fixes to be made to the product.
Once you have created your product, feedback from the marketplace will feed into future enhancement requirements for the product. Changes in customer requirements, market conditions, or technology may cause changes which are then placed into the Product Backlog for action. Your Product Backlog will become a living source for future product development.
Planning Board
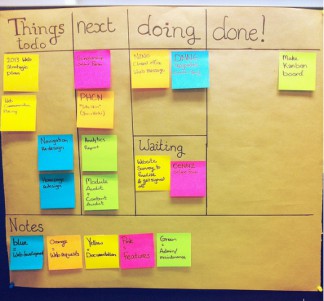
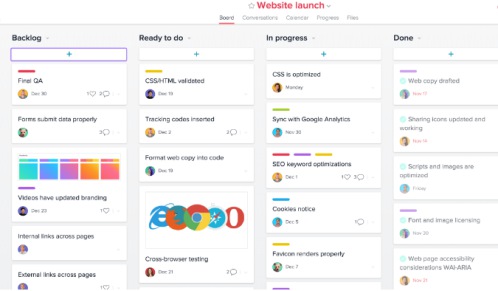
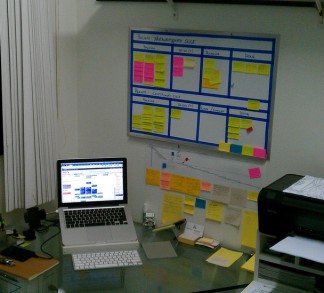
The purpose of the Planning Board (aka Kanban Board) is to visualise the flow of work items from start to finish. You are able to see at a glance what is to be done and what work is currently in progress. As well as where work is blocked and what work has been completed. This essential tool helps manage workflow, maximise throughput and represent progress.
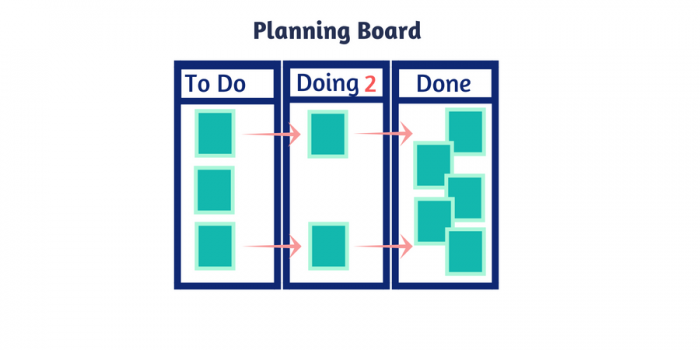

Cards are created to represent each work item. Each card is moved from left to right across each of the different stages as the work item is worked on. Once completed the work item is moved onto the next stage. Depending on the WIP limit the team member selects the next card to work on.
The most simplistic Planning Board has three columns - To Do, Doing and Done. As you become more familiar with your optimal work process you can adapt the Planning Board by expanding it to include additional sections eg testing, review, design etc. Adopt what works for you and adapt what doesn't.
Stage 4 - Setup Your Planning Framework
The 3 main focus areas we will keep 'top of mind' are:
1. Sustainability - finding a sustainable pace and improving focus
2. Service Orientation - attention on performance and customer satisfaction
3. Survivability - staying competitive and adaptive
By completing the following you will have the beginnings of a solid planning framework that you can continue to evolve over time:
- map your process workflow
- set work in progress limits
- create your planning board
Create Your Planning Board
Tools
In keeping with the KISS principle (Keep It Simple, Stupid) you can create your planning board with old-fashioned pen and paper.
Here is a shopping list of what you will need
- plain paper (the size of a desk planner is useful)
- pens
- ruler
- sticky notes (eg PostIt notes)
- Blu Tack (to stick the paper to your wall)
If you already have a chalkboard or whiteboard you could use that instead. There are also apps available, some free, but for now, we will keep it simple. The board should be big enough and the title of the work item cards visible by those working nearby. I have my Planning Board on the wall above my workstation where I can see everything at a glance.


Map Your Workflow
Your Planning Board allows you to keep track of the big picture while also providing a view of how the flow of work is progressing. By making all the work visible, including blockers and queues, you can identify issues early on.
The first step is to identify the stages any work goes through from start to finish. There are dozens of steps that we could add to the Planning Board, but it would soon become cluttered and the benefits of easily visualising your workflow lost. Display the top level process steps required to get your idea from conception through to completion. To get you started you may want to keep it simple initially with Product Backlog, To Do, Doing and Done being the major stages.
Establish Your Work In Progress (WIP) Limits
Armed with the knowledge of your workflow, establish your work in progress (WIP) limits. Establishing your WIP will prevent too much work or too little work entering your system. This will result in improved flow and your product getting into the hands of your eager customer quicker. Balancing demand on your time with your capacity improves throughput and ultimately decreases cost. Start off with a WIP limit of one. Then as you progress through your planning system you can revise the limit. If you have a team then start off with the number of people working on each workflow stage.
The aim here is not to have too many spinning plates. The more you have in play, the greater likelihood they will come crashing down around you. That's a whole bunch of stress you don't need when there is a far better way at your fingertips.



Create Your Planning Board
The Planning Board you create initially will probably change over time as you become more familiar with your product development processes and what works for you. Don't get hung up on making it perfect first time.
Use the following steps to create your Planning Board:
- rule up your paper into columns
- label each column with a heading for each of the major process step within your workflow
- beside each column heading note the WIP limit, you established earlier
Your Planning Board is now ready to be populated with the work items necessary to create your digital information product. At the stop to Plan Your Product Creation we will identify the work items and note the details onto the sticky 'cards'. You will then add these cards to your Planning Board.
You can change the process steps you have displayed or the WIP limit set, as you learn from each project and implement improvements from lessons learnt. Remember this is about getting traction and working out what works for you, it doesn't have to be picture perfect.
Utilising proven planning methods is essential to the creation of profitable information products.
A Planning System you can Trust
Having worked in the IT industry developing a wide range of products and services for over 20 years, I have utilised both traditional and Agile planning methods. As a fellow entrepreneur who undertakes 98% of the work myself, I now solely use the parts of the Scrumban methodology that make sense for my work practices. That's the beauty of this method, it is not prescriptive and you can 'adopt and adapt' different aspects as you grow.
Learning anything new will feel uncomfortable initially, so trust the system and with each application, you will increase confidence and familiarity. Before you know it you will be flying through creating amazing products with ease.
Having created your Planning Board you are now well set up to take on the next process in this planning phase - essential product creation preparation.
